Managing Workflows
This section includes information about managing workflows. Click on a topic below to learn more.
Enabling Workflows
Before a workflow can take effect, it has to be set as default or enabled. A default workflow is automatically applied when you create a new ticket. Setting a workflow as the default workflow means that any tickets that do not have a workflow assigned to them will automatically use the default workflow. Every application or module must have a workflow marked as default. Enabled workflows can be utilized through customizations such as setting the workflow field within a ticket instance.
Note: For a ticket to use an enabled workflow, that workflow must be assigned to the ticket. You can learn more about assigning workflows to tickets in the Configuring Multiple Workflows topic under Workflow Automation.
By default, all tickets use the default workflow. If a ticket is still open when the default workflow changes, then the ticket will immediately begin using the new workflow. This may lead to unexpected errors if, for instance, a ticket is in a State that was present in the old workflow but not the new workflow. However, assigning a workflow to a ticket means that the ticket will always use the assigned workflow unless it is disabled or deleted, regardless of what the default workflow is.
Enabling a workflow takes effect immediately. ChangeGear does not need to be restarted, nor do users need to log out of the ChangeGear Web client.
WARNING: Always check the roles and permissions associated with a workflow after setting a workflow to be default or enabling it. Serviceaide recommends configuring privileges immediately after enabling a new workflow.
To enable a workflow:
-
In Design Studio, click All Apps, or navigate to the desired app (i.e. Change), then select the Workflows component. All workflows are displayed.
-
Hover your mouse over the workflow you would like to enable, then click the pencil icon
 to edit.
 -
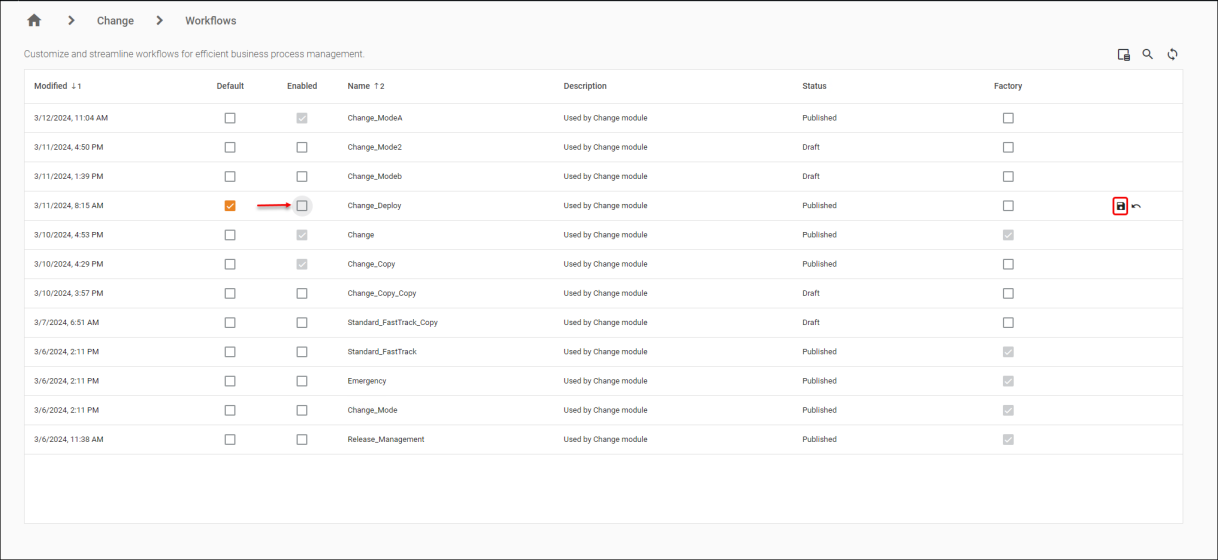
Click the Enabled check-box.
-
Click Save.
To set a workflow as the default workflow:
-
In Design Studio, click All Apps, or navigate to the desired app (i.e. Change), then select the Workflows component. All workflows are displayed.
-
Hover your mouse over the workflow you would like to set as the default workflow, then click the pencil icon
to edit. -
Click the Default checkbox. This enables the workflow and sets it as the default.
-
Click Save.

Modifying Workflows
This section provides generic instructions on how to modify workflows.
To modify a workflow:
-
In Design Studio, click All Apps, or navigate to the desired app (i.e. Change), then select the Workflows component. All workflows are displayed.
-
Select an existing workflow to modify. You can either create a copy of the workflow or open the workflow in Design Mode, then save it as a new workflow. If saving as a new workflow, name the workflow and click OK. The Main Content Area displays.
-
A new workflow is created in "Draft" status and you can make the appropriate modifications to the workflow via the Workflow Designer.
-
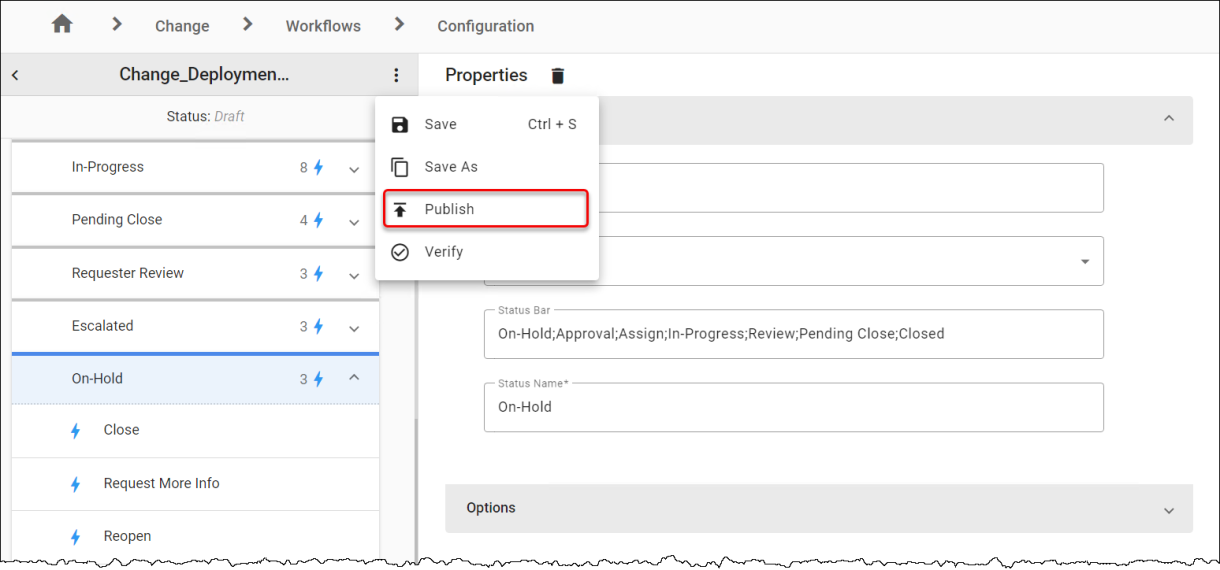
Click the 3-dot menu next to the workflow name to Save and Publish the workflow.
Note: In order to use your workflow for new tickets, the workflow must be enabled or set as the default workflow. For more information, please see Enabling Workflows.
Disabling Workflows
Disabling a workflow ensures that the workflow can no longer be accessed outside of the Workflow Designer.
To disable a workflow:
-
In Design Studio, click All Apps, or navigate to the desired app (i.e. Change), then select the Workflows component. All workflows are displayed.
-
Hover your mouse over the workflow you want to disable, then click the pencil icon
to edit. -
Deselect the Enabled checkbox.
-
Click Save.
NOTE: The workflow that is currently set as the default workflow cannot be disabled without first setting another workflow as the default. If a disabled workflow is assigned to a ticket, then the ticket will fall back to the default workflow.
Creating a New Workflow
You can create a new workflow by using the Copy Option to copy an existing workflow or from the Save As option.
To create a new workflow:
Copy Option
-
In Design Studio, click All Apps, or navigate to the desired app (i.e. Change), then select the Workflows component. All workflows are displayed.
-
Hover your mouse over a workflow and select the Copy Row
 option.
 -
If you wish to rename the copied workflow, double-click the row, or click the Design icon
 to configure and enter a new name for your copied workflow.
 -
Click the 3-dot menu next to the workflow name to Save and Publish the workflow.
Note: Privileges are not transferred to the copied workflow.
Save As Option
-
In Design Studio, click All Apps, or navigate to the desired app (i.e. Change), then select the Workflows component. All workflows are displayed.
-
Double-click the workflow you wish to modify, or hover over a workflow and click the Design icon
to configure. The Main Canvas Area displays. -
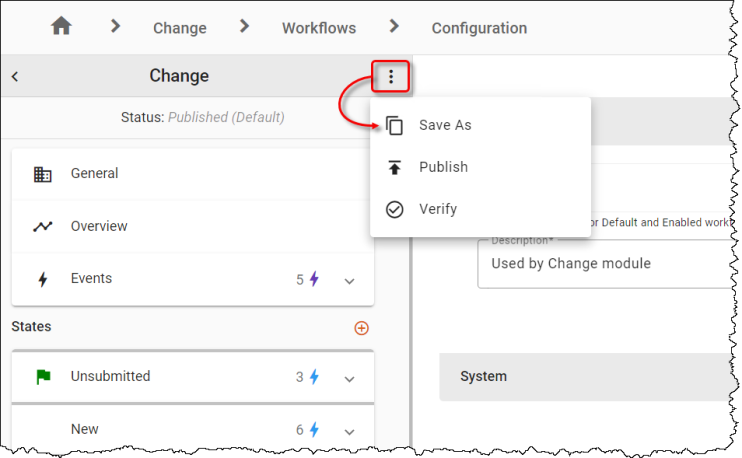
Click the 3-dot menu next to the workflow name, then click the Save As option.
-
A new workflow is created in "Draft" status and you can make the appropriate modifications to the workflow via the Workflow Designer.
Note: A workflow cannot be renamed once it is published.
Deleting Workflows
Deleting a workflow removes all references to the workflow from ChangeGear. Tickets that are using this workflow will revert to the default workflow.
Warning: Deleting a workflow that is in use can leave tickets orphaned if the ticket state is not part of the default workflow or there are no valid transitions from it.
To delete a workflow:
-
In Design Studio, click All Apps, or navigate to the desired app (i.e. Change), then select the Workflows component. All workflows are displayed.
-
Hover your mouse over the workflow you want to delete, then click the trash icon
 .
.
-
A confirmation dialog will appear asking if you're sure you want to delete the workflow.
-
Click Yes to delete the workflow.
Note: Factory, Active, and Enabled workflows cannot be deleted.
See also: